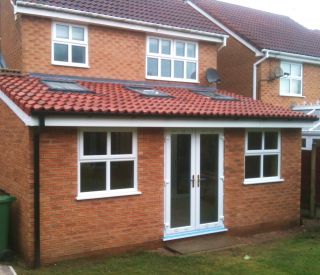
Extension in Standish, Wigan
by Wigan builder - Chris Smith
|
Rear extension (completed) and a 2nd extension above garage with en-suite No deposit was taken & not a penny was asked for until I had the full base in up to D.P.C |
|
Just two of us did the entire build, including the central heating, electrics & painting |

|
|
|
 |
 |
|
No room to get my mini JCB in, so a weeks hard graft ahead I think. |
We dug out to hard ground....then dug out some more, just incase! |
12" lower than the existing house foundations, and its only for a single story extension too! |
Five foot deep by pick, spade & wheel barrow, a good job is built on proper foundations. |
|
|
 |
 |
 |
|
Mr & Mrs Darby in at the deep end, still smiling though! |
Me & a clean garden, even though we had dug out 3 skip fulls of spoil, its was still spotless. |
Really love the barrow service from the concrete lads. |
The new type of trench block going in.... with handles! |
 |
 |
 |
 |
|
Existing drains exposed & new route planned. |
Simply extended, but with additional rodable access on the sink & soil with gravel back fill. |
Making good use of the Arbortech saw, a great invention from Australia no less! |
This is how to convert an outside gully into an interior space, gas sealed with access, not just concreted over like the cowboys do! |
 |
 |
 |
 |
|
Hardcore crusher run pressing down to the inside foot of the strip foundations & compacted with a tarmac pole, never put soil back in! |
Paving flags removed from inside & inner skin being built. A good view of the cavity extension in the house too. |
I always leave out the side face brickwork until the slab has been poured & tamped, as it makes for a better finish. |
How many times do you see a cavity wall just carry on where the doors are going? well its wrong! this is the right way to do it! |
 |
 |
 |
 |
|
Blinding sand tipped in. |
Sand layer leveled & compacted. |
90mm rigid insullation to the floor & 25mm around the edges. |
Building regs state that a 100mm thick floor is the minimum requirement, but I always make mine at least 150mm thick plus steel mesh on mushrooms too! |
 |
 |
 |
 |
|
Cavity floor weep vents going in. |
Concrete layed & covered up for the weekend as it was chucking it down! |
Result, a lovely clean, level & smooth floor. First Payment asked for & received. |
Brickwork next, joined to the house with stainless steel catnic wall starters as per regs. |
 |
 |
 |
 |
|
Ahhh... the sun did eventually come back out. |
85mm full fill cavity bats. |
Insullation straight through into house. |
Looking good, but wet! |
 |
 |
 |
 |
| Double joists glued & screwed. | Cavity tray in & birdsmouth with skew nailing. | Wall plate bolted between every joist with DPM back. | Gable ends strapped across rafters & trimmers. |
 |
 |
 |
 |
|
Insulation right to the top of wall plate, batten stalks in. |
Heavy duty catnic lintols, with internal insulation. | Heavy duty drip felt into gutters & a ply eaves support | BAA approved felt ofcourse. |
 |
 |
 |
 |
| You should'nt run lightweight felt straight into the gutter, it just curls up & flutters in the wind, see? | We took the scaffolding down every night & used staging for the gutter | The top peak of the low pitch tiles were cut off as Velux suggests, in order to achieve a tight flashing. | A trouble free cloaked verge ontop of a barge board to match the rest of the house. |
 |
 |
 |
 |
| A perfect, neat & tidy roof. | Side view, lovely, 6 weeks in. | 100mm Kingspan ready to be foil taped. | Pipes to be boxed in & insulated. |
 |
 |
 |
 |
| Prepairing the opening into the house. I cut a bit, then use strong boys as I move along, rather than using needles and wrecking the walls above. | A water fed Stihl saw doesnt half make a mess though! | I always load up the top of the RSJ with mortar, then squeeze it up into the brickwork above with an accrow prop to get a full bed, no cowboy slate bits bashed in on my jobs! | I hate mess, so even though the windows will be skipped, I still cleaned & polished them before I came home. |
 |
 |
 |
 |
|
Kitchen area all covered over, ready for the break through. I take my time & make sure the structure is fully supported & nothing is missed before we take out any walls. |
The kitchen goes 'under' the gable end, into the rear garage, so there are two RSJs above these props at 90�� carrying everything above, along with the floor joists. |
You can't have to many supports!& as I removed the existing plaster, I discovered the internal walls were only built from crappy light weight blocks... |
So we rebuilt the whole corner with solid concrete blocks for extra strength, as this corner is about to hold up a quarter of the house! |
 |
|
 |
 |
| The correct way to install remedial lintels, load the thing up with mortar, then acrow it up into the brickwork above & squeeze level, then shim up from padstones when dry, easy. | A great pic of a pad stone laid onto its side to help spread the point load over the dense concrete block wall underneath it. | Everything was pre measured, built & arranged so that on Monday morning, 4mm steel shims can be hammered into this waiting gap, using slate is NOT the way to do this important job. | Even though I add mortar accelerator to the mix, the supports were left in place for at least two days setting time, and luckily for us, this was done on Friday morning. |
 |
 |
 |
 |
|
Shims are snuggly hammerd home. |
Knowing the internal walls were light weight block, I fitted a padstone on the other side too, across both walls. |
To do this properly, I simply took the strain with an under needle using another RSJ. |
The results were solid and not a hint of a crack aywhere. |
 |
 |
 |
 |
|
I needed access to the centeral heating ring for the first fix plumbing and with a modern floor, it can be a pain, but this is the correct way to go about it. |
I found the pipe run with a metal detector, then set my router to 17mm as the sheets were 18mm. |
Using 'Trends Routabout' made the job easy. |
The cut is then flipped over into the plastic insert. Lovely job. |
 |
 |
 |
 |
|
Door & window install, latest argon filled double glazed units going in. |
Starting the dry lining after the first fix electrics were in. |
Grading in the beads & joints first. |
Wiring regs state that every junction box must be accessable for servicing, so I put them all behind a panel ready for a 2nd fix later. |
 |
 |
 |
 |
|
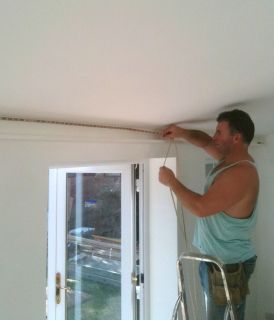
I thought i'd better 'be' in a few pics, just incase people may doubt that I do every part of my builds! |
A hand pressurised water spray makes this job neater (and dryer) |
No mess, no fuss. |
Pipes checked, sound proofed & boxed in, wiring for wall lights in, ready for a skim. |
 |
 |
|
|
|
I installed the heating myself by dropping 10mm microbore from the 15mm flow/return |
Polishing off |
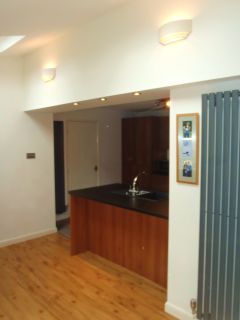
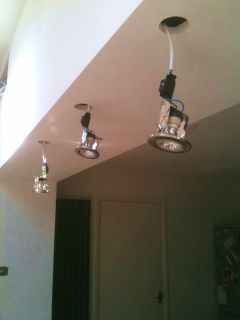
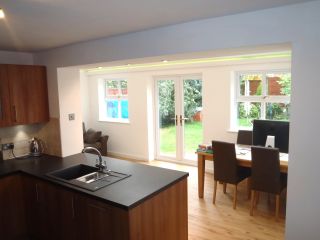
Down lights over breakfast bar |
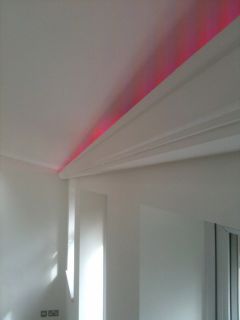
Installing the srtip LED's & driver |
 |
 |
 |
 |
|
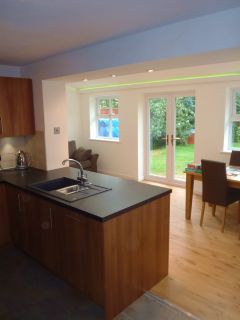
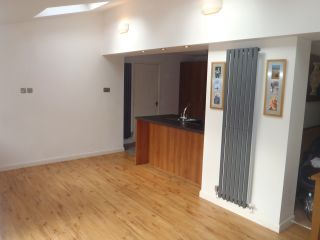
Designer everything, an excellent build this one AAA+ |
Breakfast bar with dimable downlighters |
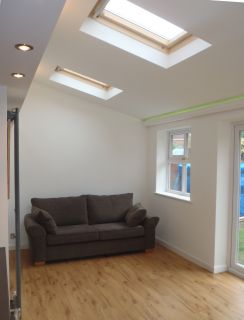
A very light and airy room |
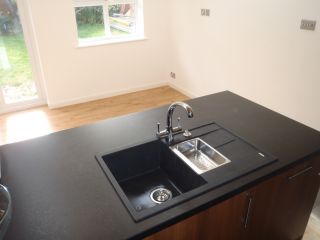
if you have to wash up, then wash up in style! |


 |
 |
 |
|
Superb kitchen & enertainment area |
LED mood lighting for the evenings |
Wow!!!! |
|
Chris Smith - local builder & top class tradesman Info@Christhebuilder.com |